

Tre, before
PART 1: STRIP
Tre was certainly not cheaply or recently made. In fact, the year 1937 was inscribed on the solid wood panel back. Looking at Tre from the front, there was an inexplicable third leg (hence the name). Upon further investigation, you could see nail remains that indicated two additional block pieces once existed to the left of this lone leg. Perhaps these were for stabilization?
I began by stripping the heavy, thick coat of paint. I used Citristrip gel. (The baby is just upstairs, so a non-chemical based, natural, and easy on the lungs remover was important.) The stuff was fantastic. Using a paintbrush, I coated the painted surfaces with the orange goo. It said to wait anywhere from 30 minutes to 24 hours (depending on the piece), but I noticed this stuff starting to work in the first 5 minutes. Tiny bubbles started to appear.


Ready!

The Citristrip is taking effect...
The bubbles eventually took over the entire surface. I waited about 30 minutes and began to strip the paint. Pushing the scraper in along the surface going with the grain, the paint came off like butter. It was beyond satisfying to push. As the paint peeled off, I started to notice another coat below. This layer was a reddish brown varnish and it was shiny, sticky, and gumming up my scraper. Some of the varnish was removed with the paint. A large portion of it remained on the surface though. I slathered on another layer of Citristrip and once again waited.

What the surface looked like after removing the paint

Go Citristrip, go!
After waiting another half hour, I scraped this next layer of finish off. It slid off much more quickly than the paint and reminded me of molasses in both consistency and color.
The wood underneath began to reveal itself with each scrape. The body of the dresser now matched it's back, telling me I'd arrived at the original wood.

Naked

Does that say 1937 or 1931? Either way, it's beyond cool. As I pulled out the drawers, I noticed that some were branded with the Necco company's logo, which was established in 1847. Since Necco was alive and well in the 1930's It's conceivable that whoever built this dresser used wood from Necco crates and this piece dates back to that time period.
With the dresser successfully bare, I used a rag to apply Klean-Strip's After Wash to remove anything left behind during the stripping process. I replaced the rag several times throughout the process- it picked up a lot of gunk! I let the piece dry overnight so I could begin sanding and painting the next day.
PART 2: PREP
At this point, the dresser looks like a blank canvas and I just can't wait to start painting. Before that can happen, I have to prep it further. I used fine sandpaper on a hand sander to smooth over each surface, being sure to go with the grain of the wood. The wood was soft as a baby's skin when I finished. Since I'd be painting over the wood, there was no need for me to sand much further. Any discolorations would be covered with paint.

Sanding

Steel wool
I used a fine sanding sponge to smooth out the small and more difficult to reach areas. I finished by going over everything with steel wool and following that with a damp cloth to ensure no dust remained. Once the surface was completely cleaned, I was ready to paint.
PART 3: PAINT
I was so ready to paint. But first I had to tape. This step is torture for me because I'm so excited to get to the painting part. It's like a kid seeing an ice cream truck in the distance and being told to walk to it. Slowly.
I used the green kind of FrogTape. I used to only use that blue painter's tape in the past but it usually let me down. I'd typically blame myself for a poor taping technique, but after using FrogTape I'm starting to think it wasn't me. FrogTape is as easy to apply as it is to remove and it does a great job. Reveals aren't nearly as heartbreaking as they used to be.
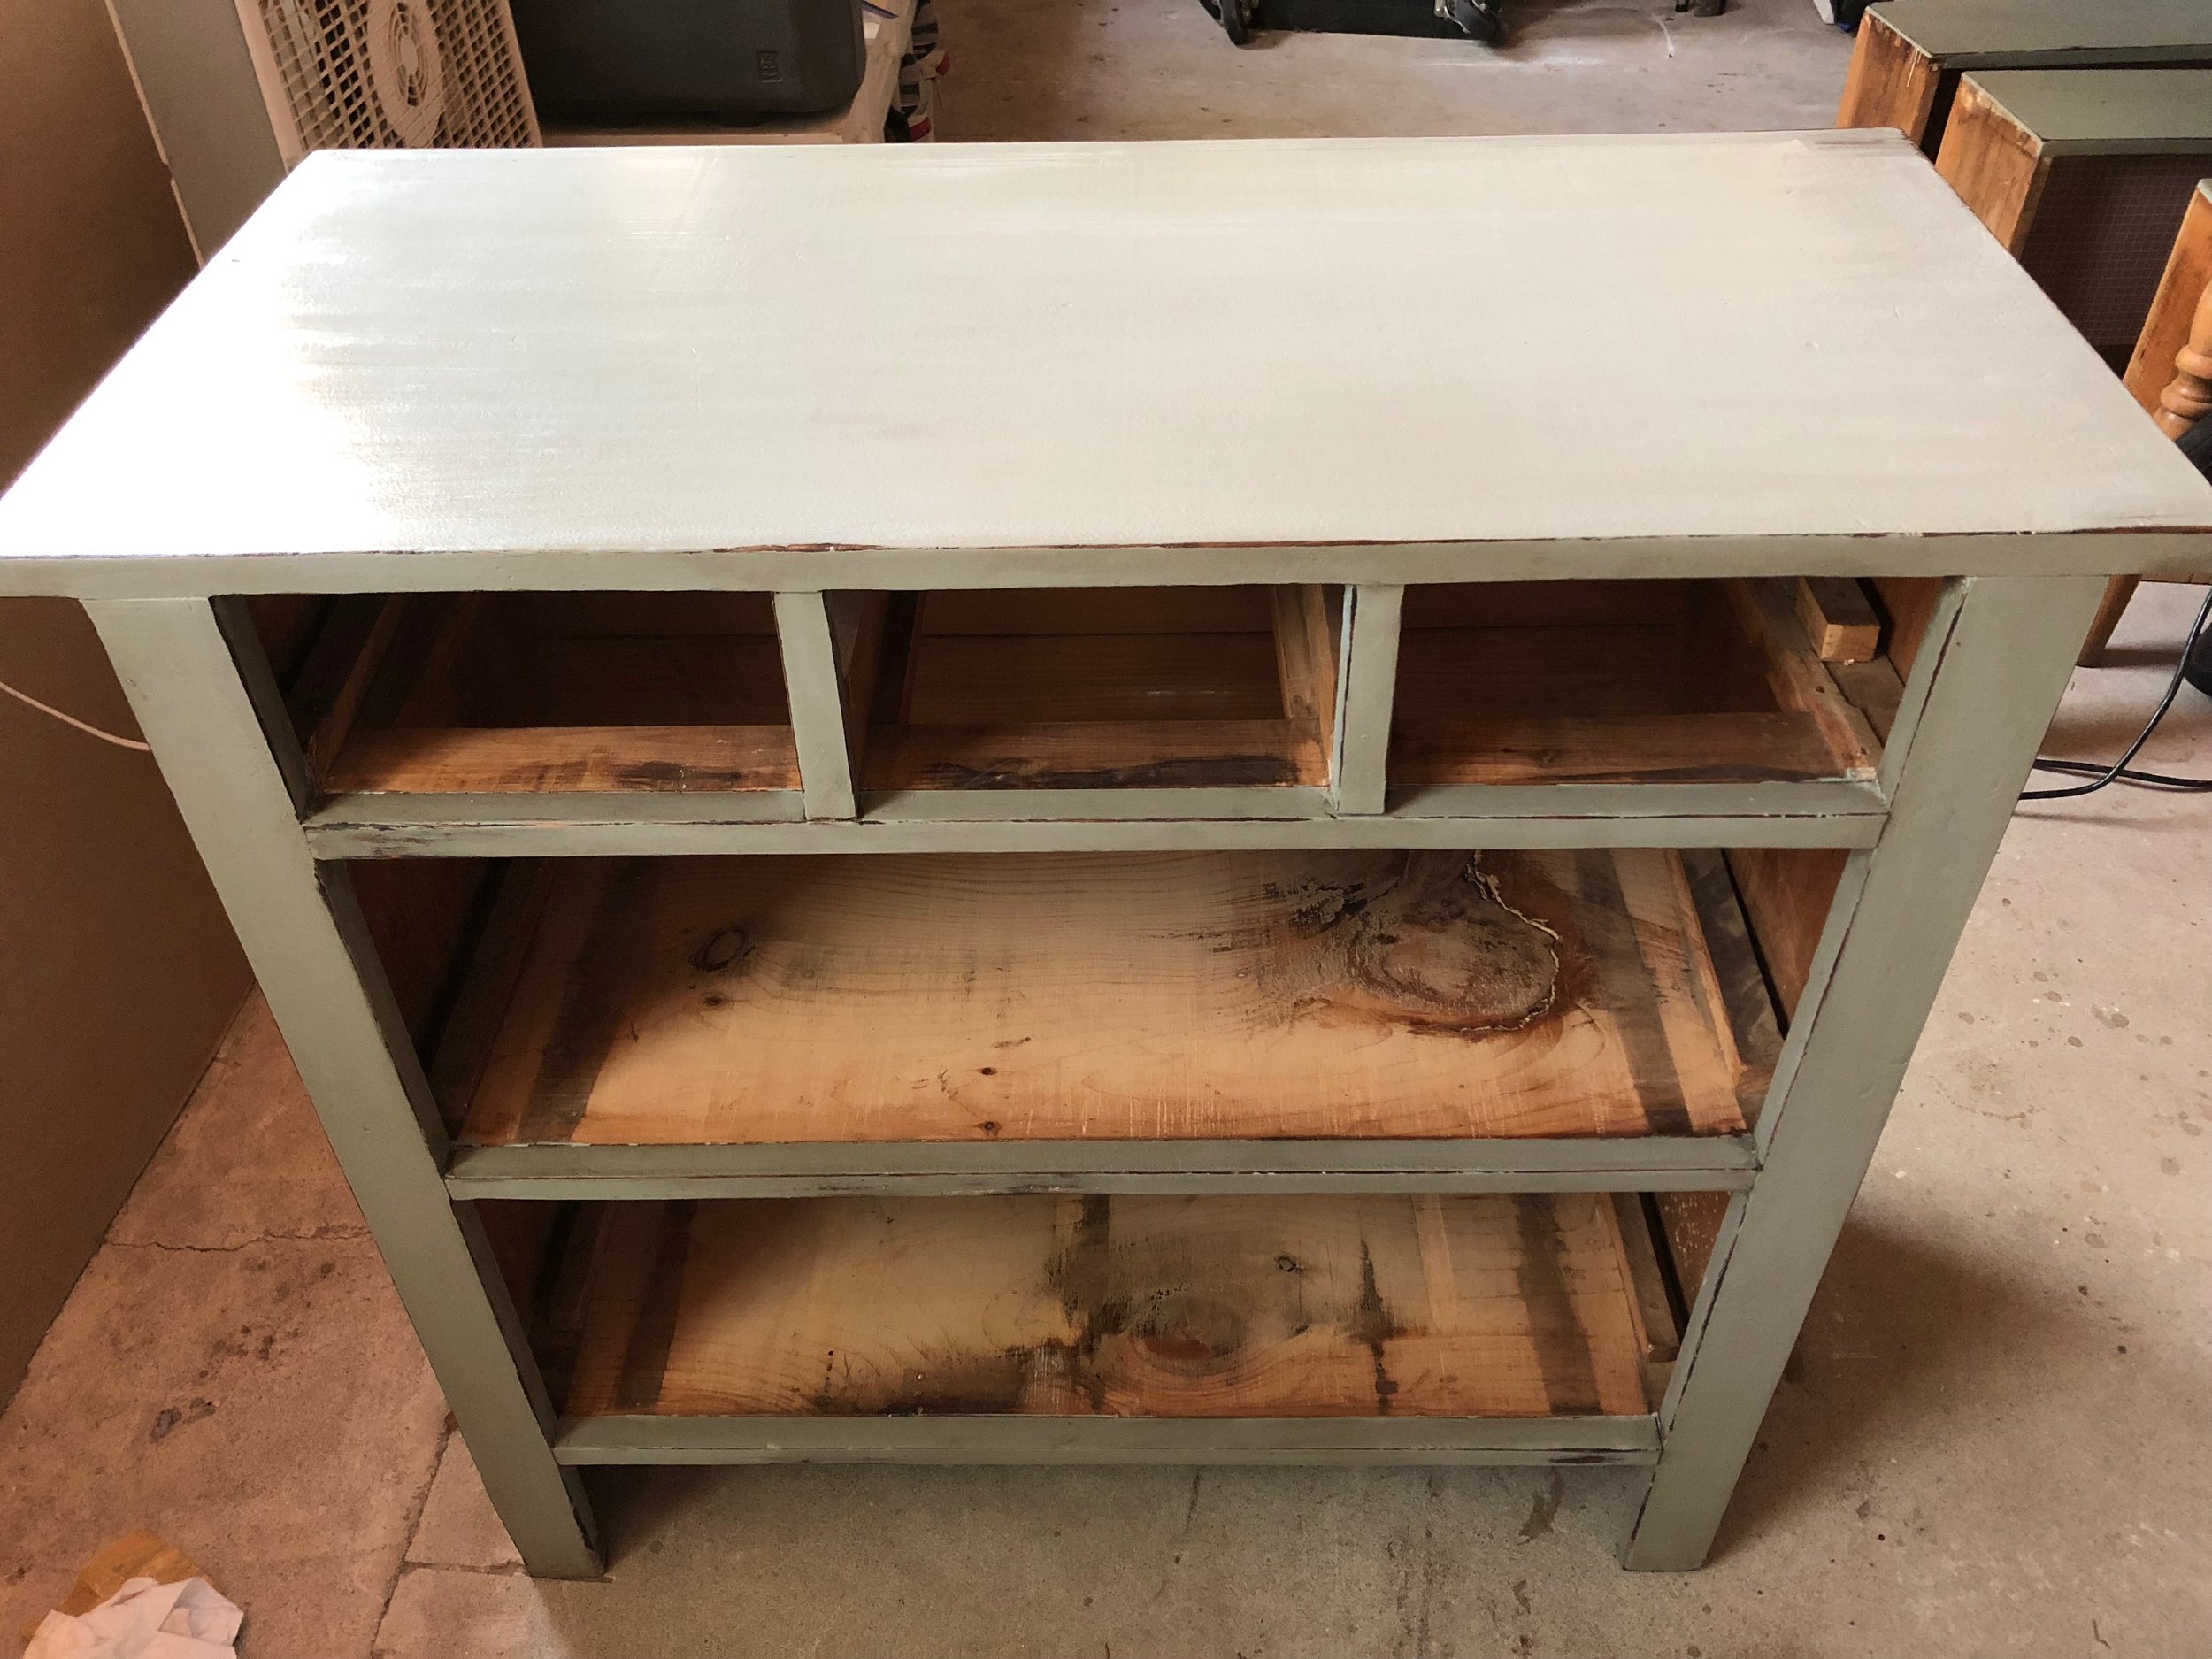
For the paint I chose Benjamin Moore's Greyhound. Years ago, I'd seen an article detailing the role lighting plays on paint colors. The article used Greyhound in the example. I thought the color was beautiful and went looking for the perfect place to use it. Enter Tre. I like that, no matter where this dresser ends up, it'll adapt to it's environment and look fabulous. (If you're curious to read the lighting article, here is the link.)
Now it was time to revisit the ongoing primer debate that's been going on in my head for years. On one hand, the primer provides a better adhesion for the top coats of paint while helping to smooth the surface. In this case I knew I wanted to distress the piece after painting and the primer would effectively negate my efforts to do so. In the end, team Skip the Primer! won and I poured out the paint. I applied two coats using a small paint roller for the larger spaces and a 2" Purdy nylon/polyester brush for the smaller areas.
PART 4: DISTRESSING AND STAINING
Given the age and history of this piece, I wanted to give it that antique look. There's a fine line between vintage and beat up so in an effort to land on the right side of that line I focused primarily on the edges where natural wear would occur. I used a fine 100 grit piece of sandpaper. I think the sanding sponges are great, but sometimes they create a blur effect on the paint when you rub. They don't completely remove it to reveal the wood below, but instead cause a dulling of the paint where you're sanding. It's a look I don't love, so I prefer the slightly harsher, less cushy paper in hand method. I'm pretty cautious with this process, pausing frequently to step away and see how it's shaping up before distressing it further.
With the piece distressed, I vacuumed and wiped down the surface with a cloth to remove the dust. Now I was going to apply a stain over the paint. I like this method because the stain especially clings to the exposed wood distressing while creating a vintage-like filter over the paint. I used Minwax special walnut stain and a Chinex brush. I poured the stain into a separate container as to not contaminate the entire can as I dipped an re-dipped my brush. Painting in the direction of the grain, I worked in manageable sections. I didn't want the stain to sit too long on the surface, or it'll would get too dark. I waited about two minutes before wiping it off with a rag. If I want an area to be darker, I repeated the process. It's important to remove the stain in the direction of the grain!

Here you can see the right side has been stained and the left is the original paint.

Removing the stain
I was so close. I'd stained the last of the drawers and was waiting for the stain to settle in. I took a step backwards and bumped into the light behind me. The light was going down and I, with a bowl full of stain in one hand and my brush in the other, tried to save it with my leg. Stain still in hand I threw out my arm, which offered the light an ideal surface to shatter upon. Light bulb fragments sailed through the air upon impact. The stain flew out of the bowl and directly into my face. Everything crashed to the floor. With stain dripping off of my face, my first thought was that I'd come TOO DAMN FAR with Tre for this to be how it ends. I grabbed a dirty rag up off the floor and smeared it over my face to get the stain out of my eyes and mouth. I quickly mopped the stain and glass from the drawers. Once the furniture was saved, I swiped paper towels across my body, which was now turning into a lovely walnut color.

This warehouse has gone ZERO days without incident.

See how the stain really deepens the distressed edges?

Hey so stain stains! But don't worry, it also can be removed over numerous rounds of dish soap, scrubbing, and pleading. The most important thing here is that Tre was saved. Lucky guy.
PART 5: POLYURETHANE and FINISHING TOUCHES
I decided to apply a water based polyurethane to the top to help protect from wear. I used Minwax polyurethane in clear semi-gloss. This is one of my favorite videos on finishing polyurethane. No need to write it all here, I did everything in that video. I applied three coats to the body of the dresser and five to the top. Only thing left to do now is add the hardware!
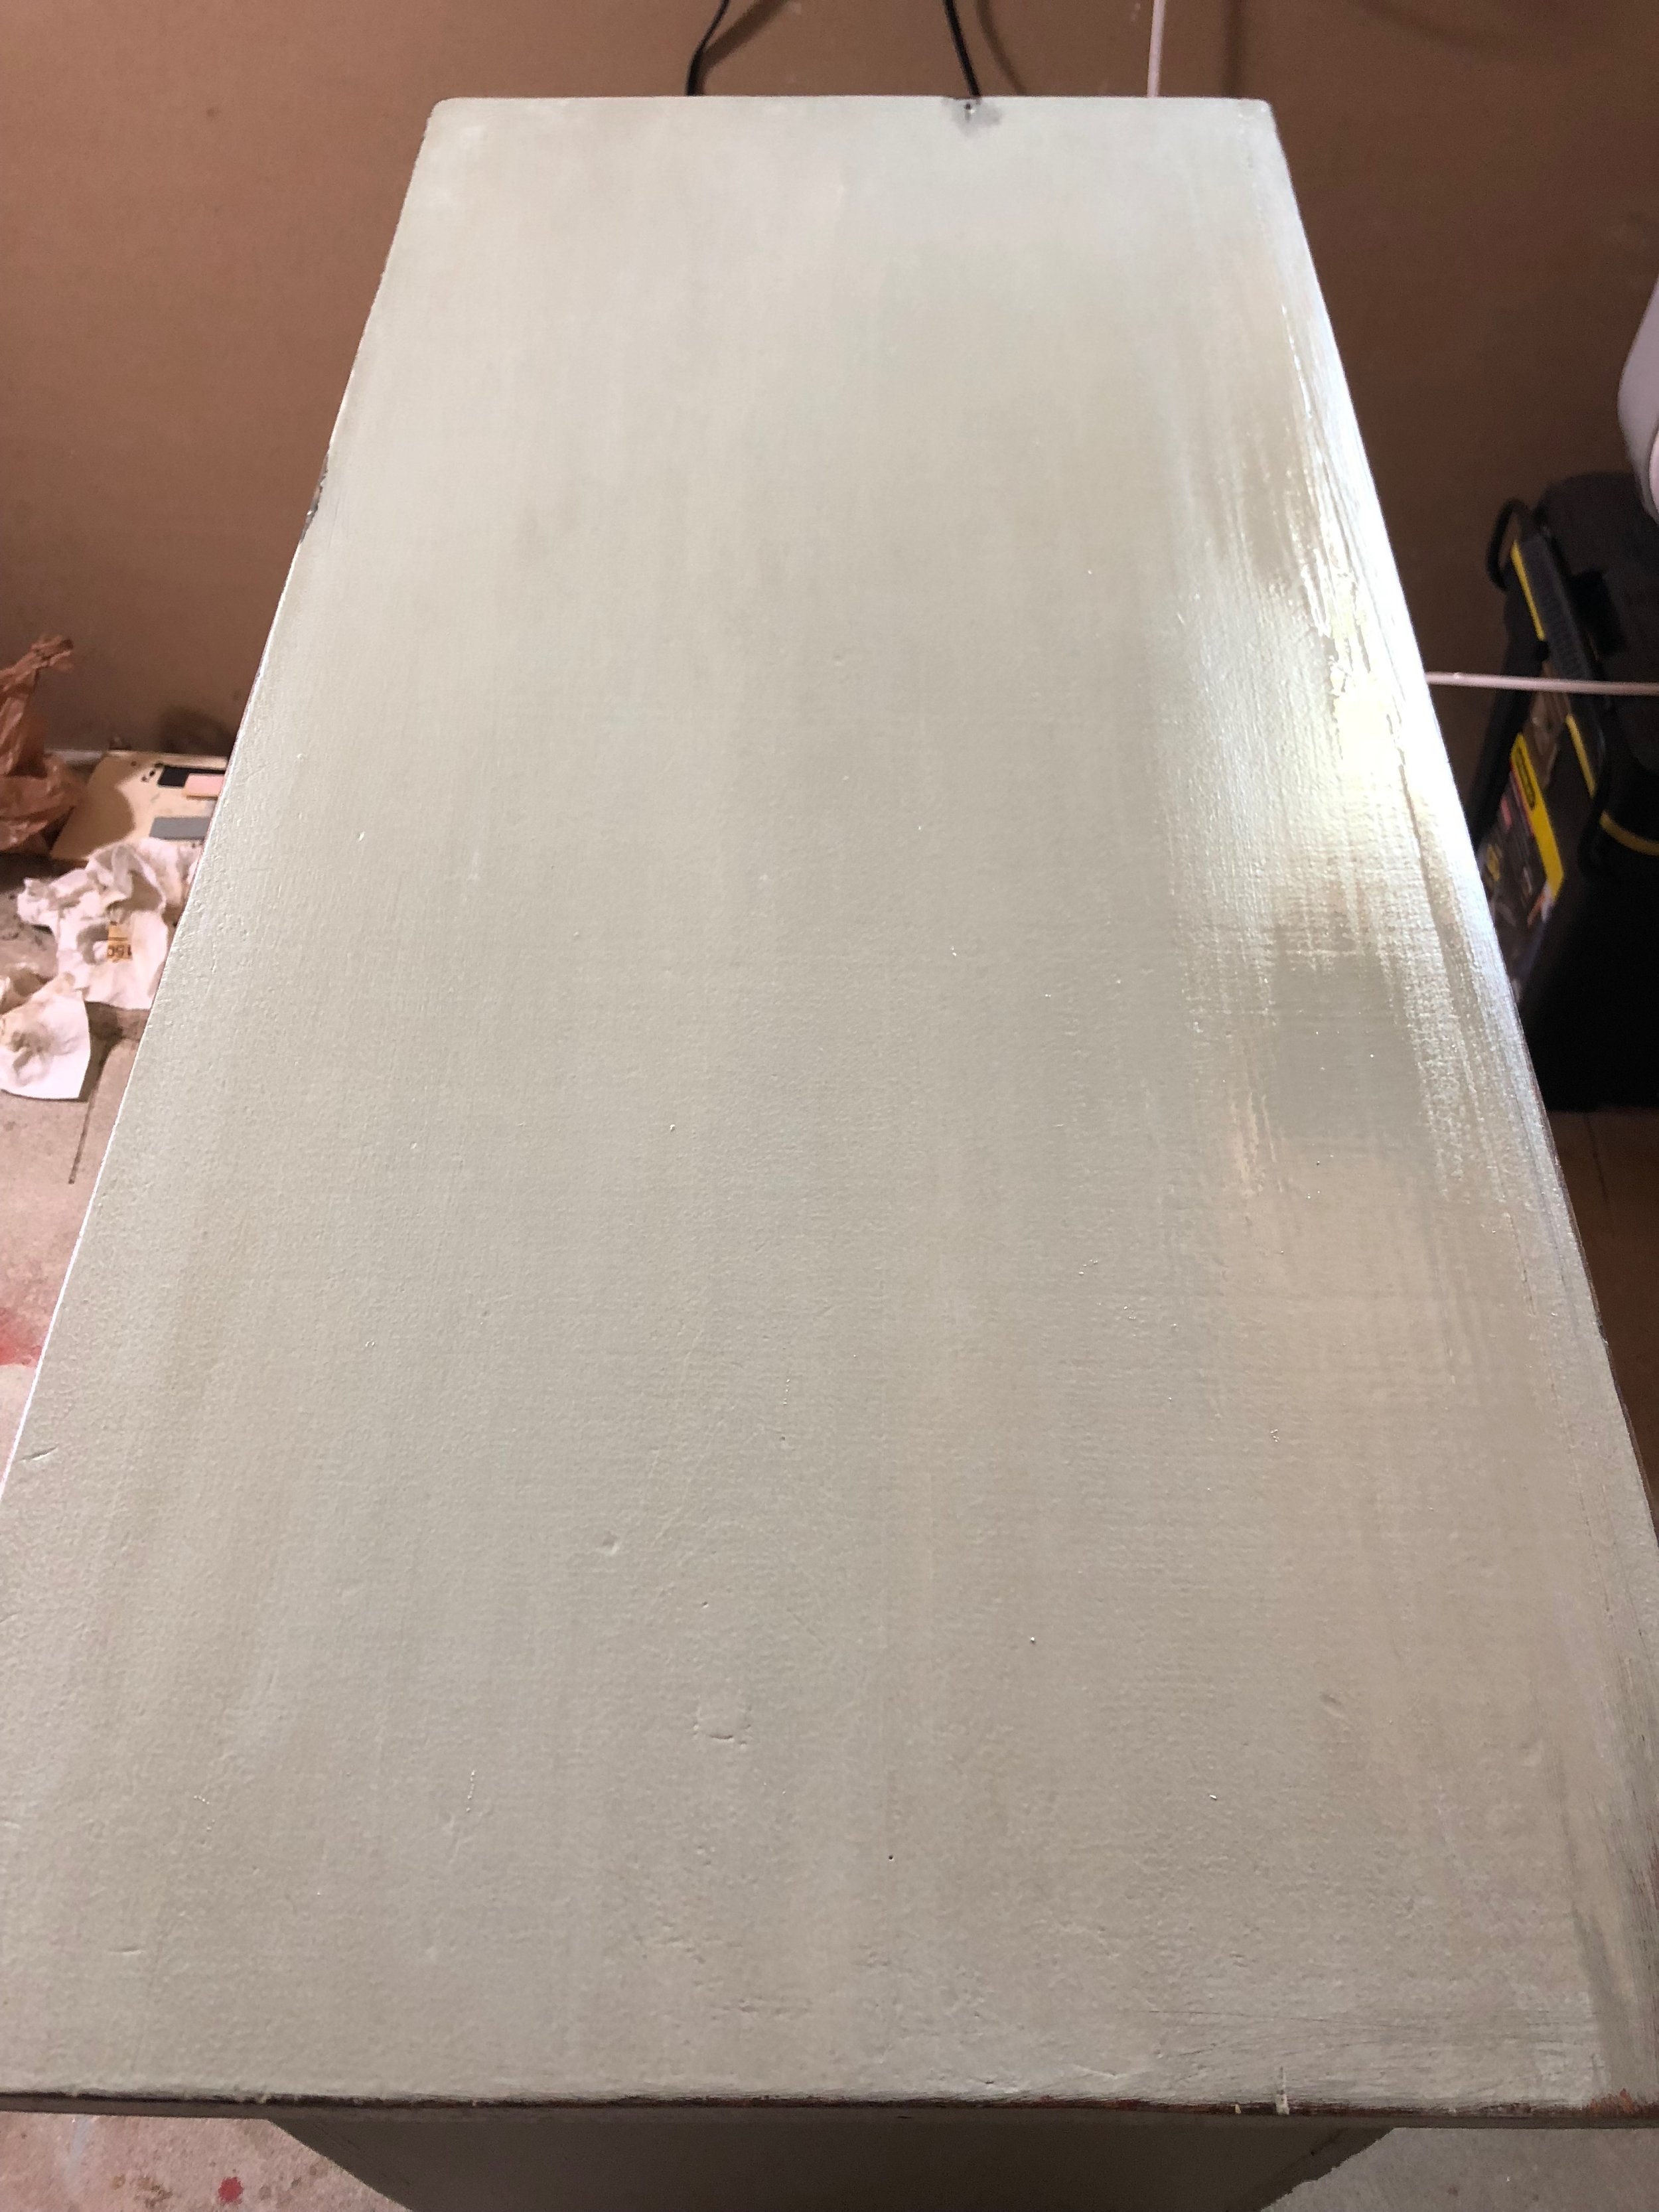
I used the light to my advantage to make sure I'd evenly coated the surface.
And now I wait...
I went with mercury and antique brass knobs from Anthropologie. I think they merged vintage elements with a touch of modern. Love!